Difference between revisions of "Imports & Exports"
(→Imports & Exports: Added last section on actually preparing and launching an import.) |
|||
| Line 9: | Line 9: | ||
| − | [[File:Reporting_of_errors_v5.png|900px]] | + | : [[File:Reporting_of_errors_v5.png|900px]] |
| Line 17: | Line 17: | ||
| − | [[File:Export_in_Excel_v5.png|750px]] | + | : [[File:Export_in_Excel_v5.png|750px]] <br/><br/> |
| + | |||
| + | Go to the relevant Import page; in the example below, click through « Administration – Imports – Products » or « Catalog – Products – Imports – Add Import » (both trails lead to the same screen). | ||
| + | |||
| + | : [[File:Import Products.png|750px]] <br/><br/> | ||
| + | |||
| + | Under the section heading File Format, there are 2 links. <span style="color: blue;">'''Click here for a list of available fields'''</span> will display a list of available fields that can (or *must) be imported; <span style="color: blue;">'''Download file sample'''</span> will download a .csv file with the column headings so you can start building a spreadsheet right away. | ||
| + | |||
| + | When you are ready to import your data, use the '''[Browse]''' button to navigate to, and select, the data file you have prepared. You can choose to '''Skip''' (ignore) duplicate Records (data items), '''Merge''' the fields from the row being imported into the existing Record, or '''Overwrite''' (replace) the existing Record with the data being imported. | ||
| + | |||
| + | Click the <span style="color: blue;">'''[Save]'''</span> button when you are ready to begin the import process. | ||
<center><u>[[Administration|Previous]]</u> | <u>[[Email templates|Next]]</u></center> | <center><u>[[Administration|Previous]]</u> | <u>[[Email templates|Next]]</u></center> | ||
Latest revision as of 12:34, 22 August 2017
Home FAQ page SmartBilling 5.0
Imports & Exports
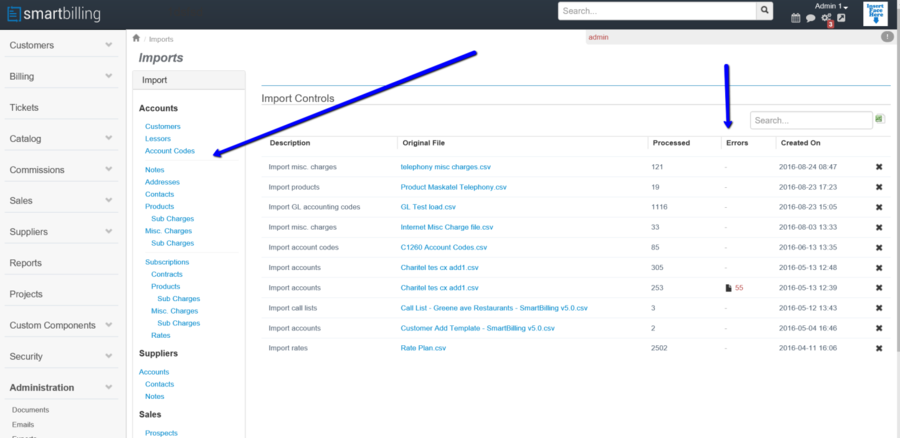
SmartBilling can manage centrally all imports or allow departments to access the import areas. The amount of information is vast and this allows an easy implementation. Again the beauty of the system is the automation of the information and the reporting of errors while importing. See further on imports at 2.1.4
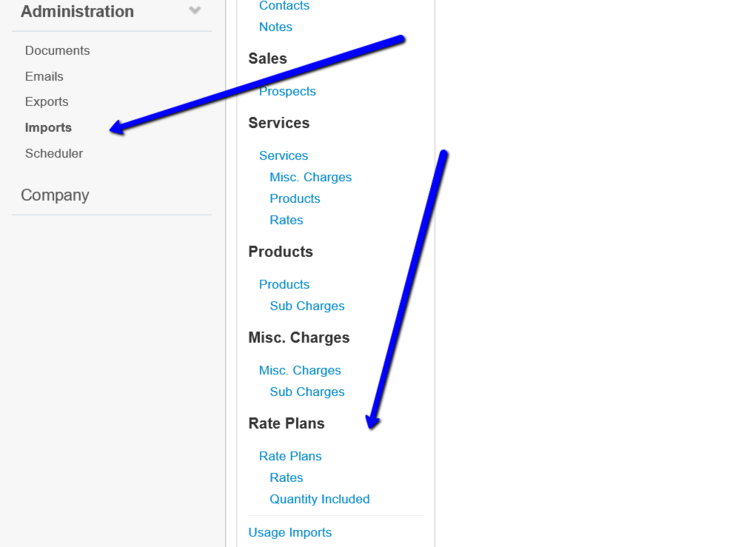
Continue info on imports. As you see below all department content could be imported while implementation of the system in order to facilitate the switch on of the system to an operator.
Exports are easier to generate than imports as there is no template reconciliation issue. The system just generates an excel with the information contained that could be exported.
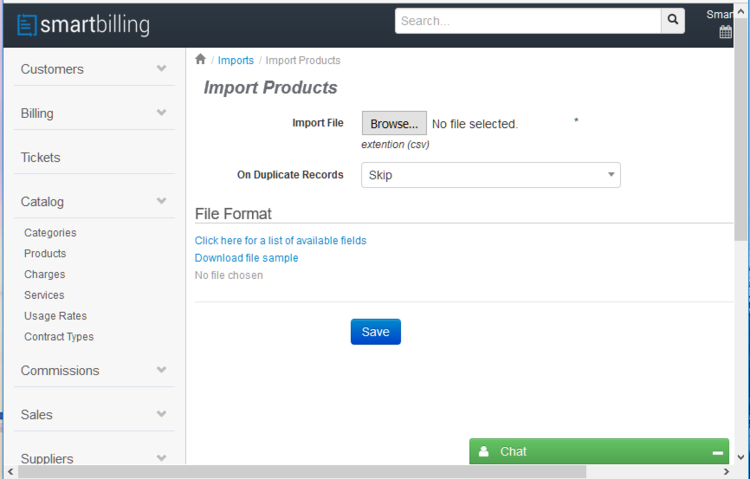
Go to the relevant Import page; in the example below, click through « Administration – Imports – Products » or « Catalog – Products – Imports – Add Import » (both trails lead to the same screen).
Under the section heading File Format, there are 2 links. Click here for a list of available fields will display a list of available fields that can (or *must) be imported; Download file sample will download a .csv file with the column headings so you can start building a spreadsheet right away.
When you are ready to import your data, use the [Browse] button to navigate to, and select, the data file you have prepared. You can choose to Skip (ignore) duplicate Records (data items), Merge the fields from the row being imported into the existing Record, or Overwrite (replace) the existing Record with the data being imported.
Click the [Save] button when you are ready to begin the import process.


