Payments
Home FAQ page SmartBilling 5.0
Payments
Payment methods
Smartbilling allows the operator to automate 100% the payment process that follows the posting of an invoice. The system is prepared to have bank to bank transfer, credit card processing or check/manual input of cheques or cash.
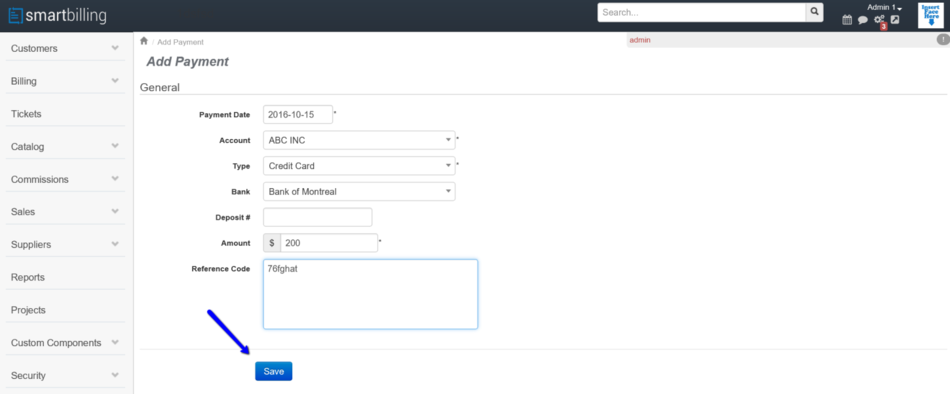
Below it is an example of a manual payment just loaded when clicked on save:
Pre-authorized withdrawals
SmartBilling prepares files containing the Pre-Authorized Withdrawal transactions for customers who have consented to pay with this method, and for whom there are unpaid invoices that have become due as of the effective date for which the files are generated. These files must be manually uploaded to the bank’s portal.
If the Bank provides the operator with a confirmation file (usually available between 24-48 hours after the request file was submitted), it can be imported into SmartBilling so that the successful transactions can be updated in the Accounts Receivable for each customer. The operator can select whether or not to automatically apply payments against the oldest invoices.
If not, the Operator can manually enter the confirmation status of each payment from the bank statement, or force them all to be confirmed as successful and reverse any payments that are not deposited successfully as the advices are received from the bank.
Payment imports
A SmartBilling payments import template can be configured if a SmartBilling customer processes payments in a separate system and wishes to import payments data into SmartBilling to reconcile subscriber billing records.
Payment allocations
Without manual intervention, the system will apply payments to accounts in the following order:
1. Invoice date (oldest unpaid invoice is highest priority)
2. Total amount (largest payable amount is highest priority)
The system does not differentiate between past due amounts between parent and child accounts, or between multiple child accounts.
Manual allocation for parent-child accounts
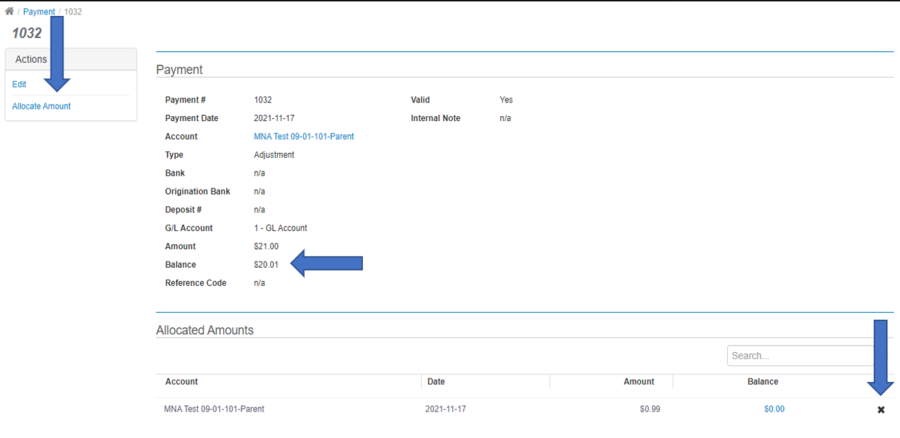
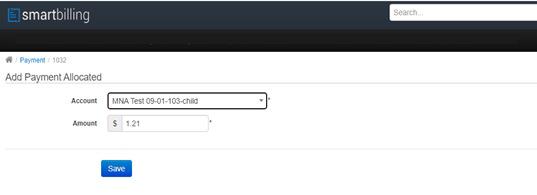
A user can choose to manually allocate payment amounts between parent and child accounts. The Balance on the Payment transaction must be greater than zero. To allocate payments, the user must first delete the auto-allocated payments, then select the option to “Allocate Amount”. The user can then choose an allocation amount and choose which parent or child account to allocate the said amount to.


Manually applying a payment to multiple invoices
A user can choose to manually allocate payment amounts if a customer has multiple invoices due. The Balance on the Payment transaction must be greater than zero. To allocate payments, the user must first delete one or more allocated payments, then select the option to “Allocate Amount.” The user can then choose an allocation amount and choose which invoices to apply the allocated amount to.
If the account is a parent or child account, the payment must first be allocated (either manually or automatically) to the parent and child accounts, and then the payment can then be applied manually to multiple invoices. Ensure you know the exact amounts of payments to be applied and the exact invoices to receive the application for all accounts. For example, to manually allocate a payment to a parent account and two child accounts, all of which have multiple invoices due:
(1) Create a payment against the parent account for the full amount of the payment. The payment will auto-allocate, and the balance will be $0.00.
(2) In the Allocated Payments section, find a payment allocation or child account wherein you want to manually select the invoices for application.
(3) Click on the blue-highlighted “Balance” amount for this allocation (it should be $0.00).
(4) On the following screen, click on the “X” icon to delete the allocation.
(5) Press the back button or go back to the payments screen. You will now see that the Balance is a positive number. A blue link called “Apply” will now also appear. Click on “Apply” and you will be see a screen with invoices for which the payment can be applied to.
(6) Repeat this for any remaining manual allocations that need to be completed.
Payments for accounts that result in negative balances
If a customer’s payment is a larger amount than their total past due amount, this results in a negative balance. The unapplied portion of the payment will also be recorded:

In the example above, the customer has a $40.00 credit which resulted from an overpayment. The $40.00 in Unapplied payments is displayed. If a new invoice is posted for this account, the system will automatically apply the Unapplied amount to the new invoice and update the customer’s Invoice Balance Due accordingly.

